
Hard Water Spot & Mineral Etching Removal in San Clemente, CA — Honest Assessment, Right Treatment, Real Results
Serving homes in Talega · Forster Ranch · Marblehead · Sea Pointe Estates · Cyprus Shore · the Pier Bowl · Rancho San Clemente
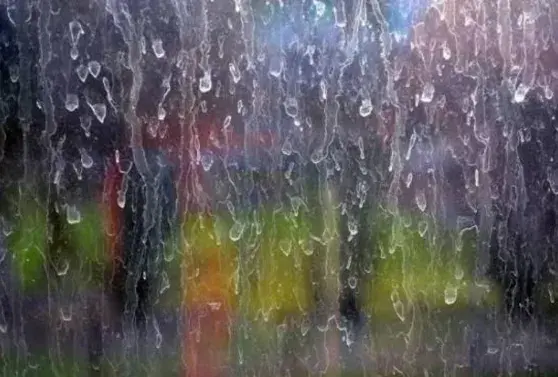
If Your Windows Still Look Hazy After Cleaning — This Is Why
You’ve had the windows cleaned. Maybe more than once. The cleaner comes, does their work, leaves. The glass looks better for a few days. Then the haze comes back. You try cleaning them yourself — vinegar, CLR, glass cleaner. Nothing makes a real difference. What you’re dealing with is not a cleaning problem. It’s a chemistry problem.
Orange County’s tap and irrigation water carries 400–600 parts per million of dissolved minerals — calcium carbonate, magnesium carbonate, silica, and trace minerals that vary by water source. Every time this water contacts your window glass and dries in San Clemente’s sun, the minerals stay behind on the glass surface. A standard window cleaning removes the loose surface film. It does not touch what has bonded to the glass.
Over time — weeks to months depending on how aggressively your irrigation system hits the glass and how much sun the pane gets — these mineral deposits progress from a soft removable film to a hard bonded crust to, in advanced cases, a chemically altered glass surface. The right treatment depends entirely on which stage your glass has reached.
We assess every window before we treat it. We tell you what stage it’s at, what treatment applies, and what result you can realistically expect — before we start anything.
Call to describe what you’re seeing. We’ll tell you which stage it is in 60 seconds.
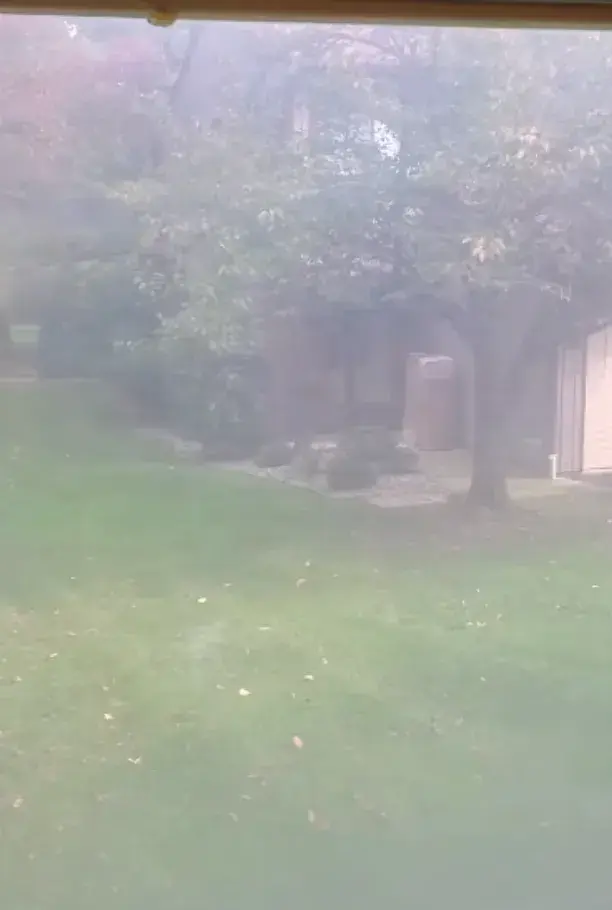
Why San Clemente Windows Get Hard Water Deposits Faster Than Almost Anywhere Else
San Clemente sits in one of the highest-mineral-content water supply areas in Southern California. OC tap water running at 400–600 TDS is approximately double the national average of around 200 TDS. That baseline mineral load combines with three local conditions that accelerate deposit progression significantly.
Irrigation systems running pre-dawn on cool glass
Most residential irrigation systems in San Clemente — particularly in Talega and Forster Ranch where HOA landscape standards require active watering schedules — cycle in the pre-dawn hours between 3 am and 6 am. At that time of morning, exterior glass has cooled to ambient temperature. Mineral-rich irrigation water contacting cool glass creates maximum adhesion conditions — the water film spreads thin, adheres closely to the glass surface, and when the sun comes up and evaporates the water, it leaves behind a highly concentrated mineral residue. This is why lower-floor windows in Talega and Forster Ranch show faster stage progression than upper floors — the irrigation spray hits them directly.
The marine layer rehydration cycle
San Clemente’s morning coastal fog — particularly during June Gloom from late May through early July — rehydrates mineral deposits that formed from the previous day’s irrigation cycle. Fresh marine layer moisture depositing on top of existing mineral residue allows new minerals from the humid salt air to layer on top of existing deposits. The cycling between dry (sun baking deposits in) and wet (marine layer rehydrating and allowing fresh deposition) is what makes San Clemente’s mineral deposit progression faster and more stubborn than inland properties dealing with the same water chemistry.
300 days of OC sun baking deposits onto the glass
San Clemente averages 280–300 days of sunshine per year. Every mineral deposit that lands on the glass during a morning irrigation cycle gets baked by direct sunlight for hours within hours of depositing. The UV and heat from OC sun accelerates the chemical bonding between mineral deposits and the glass silica surface faster than the national average for any given TDS water. A deposit that would take six months to progress to Stage 3 in a cloudier climate reaches Stage 3 in San Clemente in two to three months.
Talega or Forster Ranch homeowner seeing white spots on lower windows? Call us, and we’ll tell you what stage it is in 60 seconds.
The 4 Stages of Hard Water Deposits on San Clemente Windows
Understanding which stage your windows have reached is the only way to know what treatment is appropriate and what result to expect. We assess every window individually before any chemistry is applied.
Not sure what stage your glass is at? Call (949) 408-1235 — describe what you’re seeing, and we’ll tell you.
Stage 1 — Fresh Surface Deposits (0–4 weeks of sun exposure)
What it looks like
A soft white or slightly hazy film on the glass surface. Feels slightly rough when you run a dry finger across it. Visibly white in areas where irrigation spray concentrates — often in circular or arc patterns that reveal the sprinkler head angle.
What it responds to
A damp microfiber cloth with mild cleaning solution, or a standard professional window clean. Many homeowners at Stage 1 can address it themselves before it progresses.
Why most people miss this stage
Stage 1 deposits are subtle. They’re most visible when afternoon sun hits the glass from a low angle in late afternoon — the raking light shows the deposit pattern clearly. In morning light or overhead light, Stage 1 glass often looks acceptable. By the time most homeowners notice there’s a problem, the deposits have already progressed to Stage 2 or beyond.
The timing warning
In Talega and Forster Ranch where irrigation runs daily, glass can progress from Stage 1 to Stage 2 in as little as 3–6 weeks in summer. Don’t wait.
Stage 1 is the easiest and cheapest to fix. Call (949) 408-1235 before it progresses.
Stage 2 — Bonded Mineral Film (1–3 months of daily exposure)
What it looks like
White spotting or a consistent hazy film that does not come off with water, a standard glass cleaner, or a regular professional cleaning. The glass surface feels rougher than Stage 1. When you run a fingernail across the deposits, they don’t compress or smear — they feel hard.
What it responds to
Professional treatment with a phosphoric or citric acid-based calcium dissolver. Applied wet, left to dwell for 3–10 minutes depending on deposit density, worked into the glass with a soft pad, then thoroughly rinsed with deionised water to remove all acid residue. Stage 2 deposits are fully removable in the large majority of cases on the first professional treatment visit.
What the treatment does
The acid chemistry reacts with calcium carbonate and magnesium carbonate deposits, converting them to soluble compounds that rinse away cleanly. The DI water rinse ensures no acid residue and no new mineral deposit from the rinse water.
Expected outcome at Stage 2
Full clarity restoration in most cases. Glass should look as clear as it did when originally installed.
Think your glass is at Stage 2? Call (949) 408-1235 — this is the easiest and most complete restoration on the scale.
Stage 3 — Light Mineral Etching (3–12 months of daily exposure, or accelerated by heat)
What it looks like
White or grey haze that persists even after professional cleaning. The deposits have a rough, almost sandpaper-like texture in concentrated areas. When held up to light at an angle, you can see a clouded or frosted appearance in affected areas rather than just surface spotting. The glass may feel smoother than Stage 2 in some areas because the mineral has partially merged with the glass surface rather than sitting on top of it.
What’s happening
The calcium and silica minerals in OC water have begun chemically bonding with the silica in the glass surface itself — not just sitting on top of it, but becoming part of it. This is mineral etching. The acid chemistry that dissolves surface deposits can still reach shallow etching and dissolve the calcium component, but the silica component of the etching requires a different approach.
What it responds to
Calcium dissolver first to address the surface calcium component, followed by glass restoration compound — a micro-abrasive polishing compound similar to automotive paint correction compound but formulated for glass. The polishing compound removes the top layer of glass silica that has been altered by the etching, exposing the clear glass surface below.
Expected outcome at Stage 3
Significant improvement in clarity — typically 80–95% restoration compared to original glass clarity. In most cases, the glass looks dramatically better. Complete return to original clarity is not guaranteed because the etching process has altered the surface layer, and polishing removes that altered layer to a depth, not indefinitely.
What affects Stage 3 outcomes
The depth of the etching matters. Shallow Stage 3 — deposits that have been there 3–6 months — responds better than deep Stage 3 from 9–12 months of daily exposure. We assess before treating and give you a realistic expectation, not a promise we can’t keep.
At Stage 3, timing still matters significantly. Glass that’s been etching for 4 months responds better to restoration than glass etched for 10 months. If you suspect your glass is at Stage 3, calling sooner produces a better outcome than waiting.
(949) XXX-XXXX — Call now, and we’ll tell you where your glass is based on what you’re seeing.
Stage 4 — Deep Mineral Etching (12+ months, or repeated heat-accelerated cycles)
What it looks like
Persistent clouding or frosting that doesn’t significantly improve even after professional treatment. The glass surface has a permanently altered appearance — not just hazy, but structurally changed at the surface level. In advanced cases, the texture change is visible under normal lighting without needing raking light to reveal it.
What’s happening
Calcium and silica minerals have chemically bonded into the glass surface to a depth that glass restoration polishing cannot fully reach without removing too much glass material. The etching has become part of the glass rather than a condition of the surface.
What it responds to
Glass restoration polishing can still produce meaningful improvement at Stage 4 in many cases — removing the upper altered layer reveals clearer glass below and can restore 50–70% of original clarity in our experience. In the most severe cases, where the etching runs deep and the glass was thin to begin with, restoration reaches its physical limits.
What we tell you at Stage 4
We assess the glass and tell you honestly what we think restoration will achieve before we start. If our professional assessment is that the glass has progressed beyond what restoration can meaningfully address, we’ll say so. Window replacement at Stage 4 advanced cases is sometimes the only path to original clarity.
Worried your glass may be Stage 4? Call (949) 408-1235 — we’ll assess it honestly before charging for any treatment.
How We Treat Hard Water Deposits — The Full Process
Step 1 — Visual and Tactile Assessment of Every Affected Pane
Before any chemistry is applied, we assess each window individually. Visual inspection for deposit pattern and distribution. Tactile check — running a finger across the surface reveals whether deposits are soft (Stage 1), hard and surface-bonded (Stage 2), or rough with texture change (Stage 3/4). We check the affected areas under raking light — a light held at a low angle to the glass surface that reveals depth and texture that’s invisible under normal lighting.
Each pane gets assigned a stage, and we record which treatment applies. Panes at different stages on the same property get different treatments. A ground-floor pane in Talega that’s been taking irrigation overspray daily may be at Stage 3 while the upper-floor pane on the same elevation — which the sprinklers don’t reach — may only be at Stage 1.
Step 2 — Calcium Dissolver Application (Stage 2, 3, and 4)
A phosphoric acid or citric acid-based calcium dissolver is applied wet to the affected glass surface. This is not sprayed on and immediately wiped — it needs time on the glass to work.
Contact time varies by stage
Stage 2 deposits respond to 3–5 minutes of dwell. Stage 3 etching typically needs 7–10 minutes to allow the acid to work on the deeper calcium component. The glass surface is kept wet during the dwell period — allowing the acid to dry on the glass before rinsing can itself cause surface damage.
Working the chemistry in
After it has had time to act, we work the softened deposits with a non-abrasive pad — breaking up the calcium crust and lifting it from the glass surface. The pressure is controlled — too aggressive on Stage 3 glass without adequate chemistry pre-treatment can drag loosened mineral particles across the surface.
DI Water Rinse
Immediately after working in the chemistry, a thorough deionised water rinse removes all dissolved minerals, all acid residue, and any loosened particles. DI water at under 5 TDS leaves zero mineral residue of its own — the rinse doesn’t reintroduce what the treatment just removed.
Step 3 — Glass Restoration Polishing (Stage 3 and 4)
For panes at Stage 3 or Stage 4, calcium dissolver alone leaves improved but not fully restored glass. The etching component — the altered glass silica layer — requires physical removal through polishing.
A glass restoration compound is applied to the affected area using a low-speed orbital applicator or a hand applicator on smaller areas. The micro-abrasive in the compound removes the top layer of the altered glass surface, exposing the clear silica below. This is the same principle as automotive paint correction — removing the damaged surface layer to reveal the undamaged material beneath.
Polishing requires experience to apply correctly. Over-polishing creates optical distortion in the glass — the surface curves slightly from uneven material removal, causing the view through the glass to look wavy or distorted. We apply restoration compound in controlled passes, checking results between passes rather than applying uniformly and hoping for a good result.
Step 4 — Final DI Water Clean and Raking Light Inspection
After treatment, every pane gets a full deionised water clean — the same process as a standard exterior clean. This removes all polishing compound residue and any remaining loosened mineral particles. The final inspection uses raking light to assess the treatment result against the pre-treatment condition. We document the outcome and compare it to the assessment we made before starting.
Step 5 — Prevention Discussion
After hard water deposit removal, the glass is clean and the surface — whether restored or deposited — is as clear as it’s going to be. What happens next determines whether you’re back in the same situation in three months. We discuss two practical prevention steps with every hard water removal customer:
DI water on every future cleaning visit
Deionised water below 10 TDS deposits zero minerals when it dries. Maintaining exterior glass with DI water cleaning means no new mineral residue from the cleaning process is added to what the irrigation system deposits. The rate of future deposit progression slows significantly.
Irrigation timing adjustment if possible
If your irrigation controller is programmable, shifting the cycle from pre-dawn to mid-morning — when glass surfaces are warmer from ambient temperature — reduces the adhesion efficiency of the mineral-rich water on the glass. Warmer glass, faster evaporation, less concentrated residue per cycle. Not always feasible with HOA landscape requirements in Talega and Forster Ranch, but worth considering where scheduling flexibility exists.
Why DIY Hard Water Removal Doesn’t Work at Stage 2 and Beyond — and Can Make It Worse
This is the most common situation we walk into on a hard water removal call. The homeowner has tried everything available at the hardware store or recommended on Reddit before calling us.
Acetic acid — a mild acid that works on very fresh Stage 1 deposits. It does not have sufficient acid strength to dissolve bonded Stage 2 calcium carbonate deposits in any realistic contact time. The Reddit advice to “leave it on for 30 minutes” with vinegar typically results in a slightly cleaner surface and persistent haze. At Stage 3 or 4, vinegar produces no meaningful result.
Stronger than vinegar — contains gluconic acid and lactic acid. Effective on Stage 2 deposits when used correctly and given adequate contact time. The problem is application and rinsing. Most homeowners spray CLR, wipe it off immediately because the label warns not to let it dry, and rinse with tap water. That’s not enough contact time for Stage 2 deposits, and rinsing with tap water at 400–600 TDS reintroduces minerals immediately after removing them. When CLR dries on glass — which happens if the dwell-and-wipe timing isn’t right — it can itself leave deposits and in some formulations cause surface issues.
An abrasive approach. On Stage 1 glass, this can work — the mild abrasion physically scrubs off fresh deposits. On Stage 2 and above, the melamine foam abrades the glass surface directly without softening the hardened deposits first — dragging mineral particles across the glass and creating micro-scratches that become visible as additional haze when light hits them at an angle.
The driest and most damaging DIY attempt. A razor blade on Stage 2+ deposits without adequate chemistry pre-treatment to soften the calcium crust drags hardened mineral particles across the glass surface, creating scratches. We see this result regularly on properties where a homeowner or previous cleaner attempted to physically scrape off deposits. The scratches are a separate problem from the deposits that remain.
A persistent online myth. WD-40 is a lubricant and water displacer — not a mineral dissolver. It leaves an oily film on glass that makes the glass appear temporarily shinier, then attracts dust and organic matter that creates additional fouling.
The consistent problem with all DIY approaches beyond Stage 1: they either lack the chemistry strength to address bonded deposits, are applied without adequate contact time, are rinsed with tap water that immediately recontaminates the surface, or are abrasive in a way that damages the glass while failing to remove what it’s abrasive against.
Skip the DIY cycle. Call (949) 408-1235 — most hard water quotes take under 2 minutes by phone.
Which San Clemente Neighbourhoods See the Most Hard Water Problems
Recognise your property above? Call us — one call gets you a stage assessment and a quote.
Hard Water Spot Removal Pricing in San Clemente
Hard water removal is priced per job based on the number of affected panes, the stage of the deposits, and whether glass restoration polishing is needed in addition to chemical treatment.
Services | Pricing Structure |
Stage 2 treatment | Calcium dissolver + DI rinse only. Starting from $185–$280 for a standard residential visit with up to 10 affected panes. Additional panes quoted individually. |
Stage 3 treatment | Calcium dissolver + glass restoration polishing. Starting from $320–$480 for a standard residential visit with up to 10 affected panes. Polishing adds time and material cost. Multiple passes on deeper Stage 3 etching are quoted at a per-pass rate. |
Stage 4 assessment and treatment | Quoted individually after on-site assessment. We assess the glass and give you a realistic expectation of outcome before quoting the treatment cost. If our assessment is that the glass has progressed beyond meaningful restoration, we tell you that before charging for a treatment. |
Combined hard water removal + standard window clean | If the full property needs standard cleaning in addition to hard water treatment on affected panes, we quote both together. Most efficient visit structure for properties with a mix of affected and unaffected panes. |
Tell us what you’re seeing, and we’ll give you a preliminary stage assessment and price range by phone. Most quotes take under 2 minutes.
What San Clemente Homeowners Say
Ready to bring the light back? Call (949) 408-1235 — most skylight quotes done in 2 minutes.
Book Hard Water Spot Removal in San Clemente
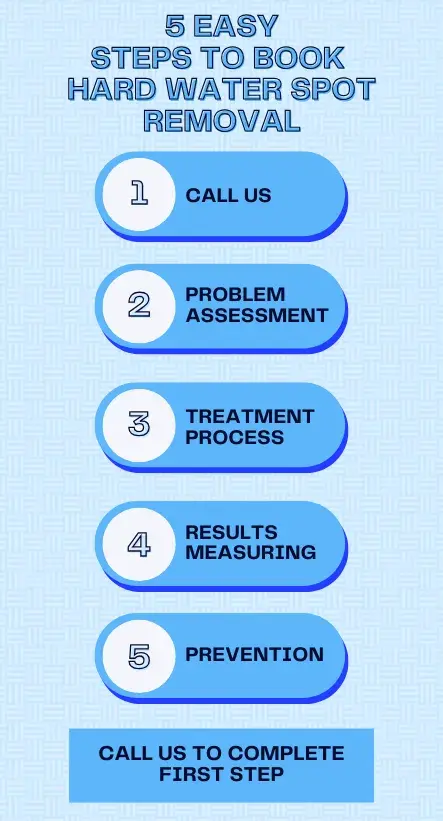
Step 1. Call us at (949) 408-1235
Describe what you’re seeing — white spots, hazy film, spotting that won’t clean off, etching that’s survived other treatments. We’ll give you a preliminary stage assessment by phone.
STEP 2. Problem Assessment
We come out, assess every affected pane under raking light, tell you the stage, the treatment, and the realistic outcome before we start.
STEP 3. Treatment Process
Treatment applied: calcium dissolver, glass restoration polishing where needed, DI water final clean.
Step 4. Results measuring
Raking light inspection after treatment. Before/after comparison. Honest assessment of what was achieved.
Step 5. Prevention
Prevention discussion: DI water maintenance schedule and irrigation timing if applicable.
Frequently Asked Questions — Hard Water Spot Removal San Clemente
Still have a question not answered here?
Call us (949) 408-1235 — real person, no hold queue, during business hours.